How to Turn One AI Experiment Into a Workflow Your Team Can Run
Turn a useful AI experiment into a repeatable workflow with clear inputs, review checks, ownership, and a verified finish line.
I scheduled two videos from zenna, one for YouTube Shorts and one for Instagram Reels. Both showed up as Scheduled. The automation logs showed two successful runs.
Neither post had reached the scheduler.
I’d already made the video, chosen the copy, and picked the publish times. The failure happened after all of that. Our automation looked for a publishing account by comparing the brand name in zenna with the account name in my scheduling tool. “Audra Carpenter” didn’t match “#AI with AUDRA” on YouTube or “audracarpenter” on Instagram. The automation found zero matches and ended the run without sending either post.
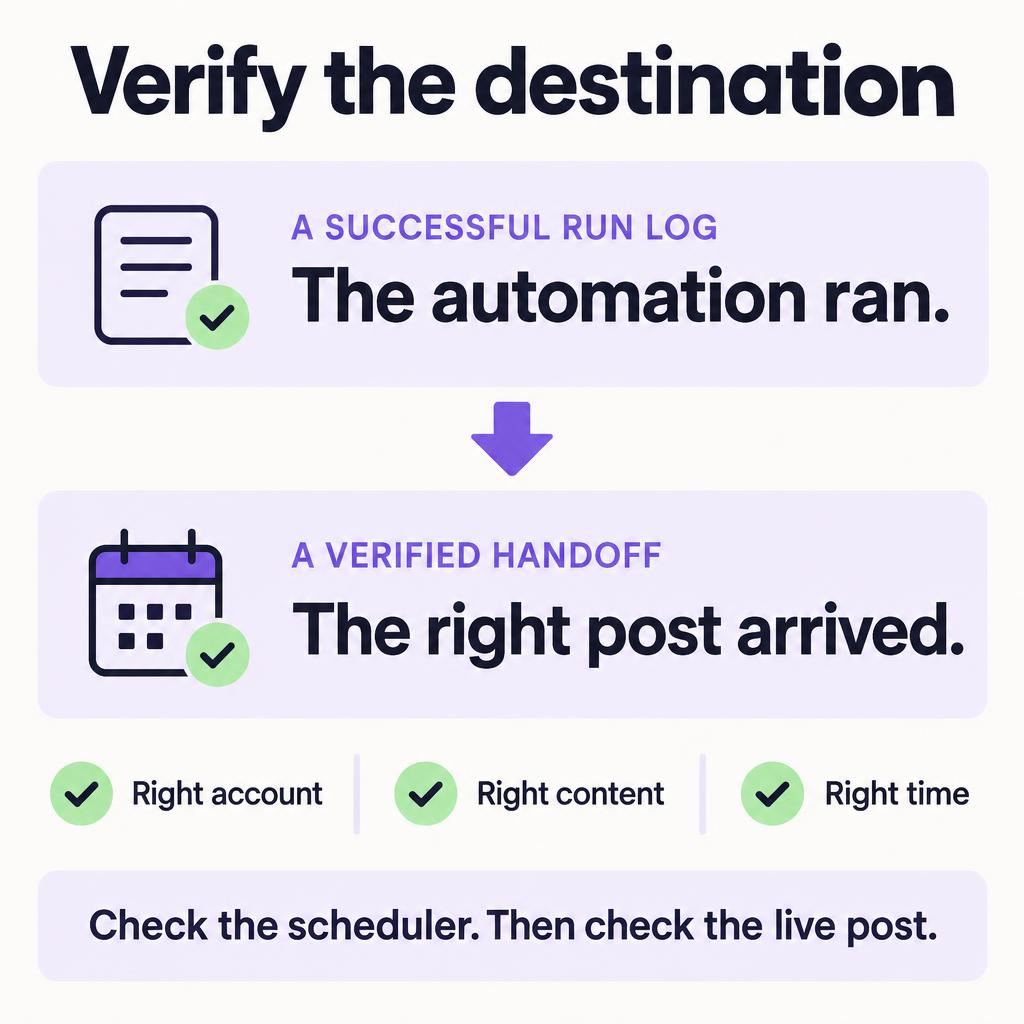
We changed the account rules to use the verified account IDs for that brand. On the next attempt, both posts appeared in the scheduler. At that point, I could verify the handoff. I’d still check the platforms after the scheduled times to verify that the videos went live.
I run into some version of this whenever I turn a useful AI experiment into something I expect to use every week. Getting a good draft or video is one part of the job. The rest is getting it through review, into the right place, and across the finish line without somebody having to reconstruct what happened.
Here’s how to build that out for one workflow.
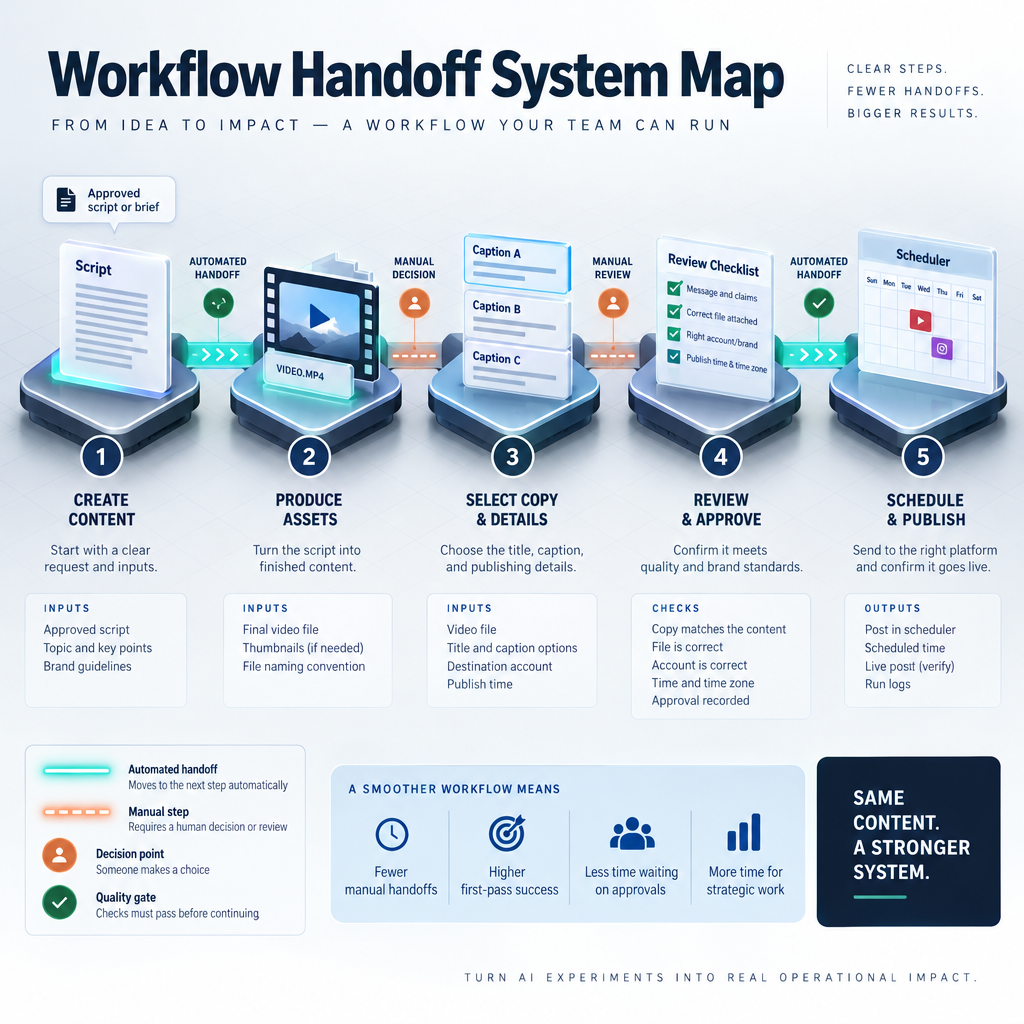
Step 1. Map the work from the request to the result
Pick something your team already does often enough that you can pull up a recent example. A client newsletter, a weekly batch of social posts, or a short video series will do. Open the actual files, messages, and records from the last time you did it. Write down what happened in order.
Start with a clear finish line. For my video test, it was two posts visible in the scheduler, each under the right account and with the right publish time. If the workflow includes checking that the posts went live, add a separate step for that.
For each step, write down four things:
- What comes in? The approved script, the exported video, or the client’s feedback.
- Who or what acts on it? The writer, the client, or the scheduling automation.
- What has to go out? The specific file, decision, or set of fields the next step needs.
- How can you tell it arrived? A saved approval, a post in the scheduler, or a link to the live post.
A social video might go from approved script to finished video, then to platform-specific copy, review, and scheduling. Look closely at the places where somebody opens a second tool to copy a link or retype something. In my workflow, the scheduling step needed the video, the chosen copy, the destination account, and the time. A caption sitting in the post record was only one of those inputs.
Mark where someone makes a decision. I wanted to choose which title and caption went with the video. Once I’d done that, sending those selections and the video to the account I chose was a repeatable task. That’s a good handoff to automate because the instructions are already clear.
Step 2. Write down what a good result looks like
Take the same example and write the checks you would use before letting it go to a client or go live. Use language a teammate could apply without asking you what you meant.
For a social video, I’d check the copy against the actual clip. Does the title describe what the video covers? Is the selected caption the version we reviewed? Did the post pick up the finished video file? Does the destination account belong to the brand on the post? Does the scheduler show the intended time and time zone?
A carousel needs a different set of checks. If you say the slides should look consistent, specify what stays the same. That might be the type scale, background treatment, and logo placement. Then say what can vary, like the image on each slide. Give the person reviewing it one approved example to compare against. They can point to a specific mismatch and send it back with a clear instruction.
Give each check a place in the workflow. Check the message and claims while the copy is still easy to change. Check the file and destination before handing the post to the scheduler. Check that the destination received it after the handoff. A good caption review can’t tell you which account the scheduler selected.
Write down what should happen when a check fails. A missing video should send the post back to whoever has the finished file. An unmapped account should go to whoever owns the scheduling setup. For the missing account, I’d want a message that names the brand and platform and tells the person what needs fixing. The scheduled status should come after the scheduler accepts the post. That gives the person looking at it a clear answer about where the work stands.
Step 3. Decide who owns the work and what needs approval
Put one person’s name next to the workflow. They’re the person who can explain how it runs, decide what to change, and help when a post gets stuck. On a small team, that might be the same person who schedules the content. The important thing is that a teammate knows who to go to when the status in one tool disagrees with what they see in another.
Write the approval rules around the decisions you already make. An evergreen post based on an approved article might need a quick review by the content lead. A post announcing a client’s new offer might need the client to confirm the price, date, and wording. Decide who gives the final yes and where it’s recorded. If the post changes after approval, agree on which edits send it back for another look.
Set a rule for retries, too. If a post looks stuck, have the owner check the scheduler before submitting it again. Sometimes the destination received the post and the original tool never got the confirmation. If the post is already there, you can reconcile the status. If it never arrived, fix the missing input or account mapping and choose a fresh time if the original one has passed.
Finally, give changes a small test of their own. When we fixed the account match, we scoped it to one brand and two connected accounts. If someone changes a caption prompt, approval rule, or account mapping later, they should know which examples to run and what to look for. A short note that says what changed and why can save the next person from trying to work it out in the middle of a launch.
Step 4. Measure what gets easier on the next run
Before you automate the handoff, track one or two runs the way you do them today. You can do this with a simple note. Record how many times someone had to move information, where the work waited, and what had to be corrected after review. Keep active work and waiting time separate. Five minutes of edits and a day waiting for approval call for different fixes.
For a small content team, I’d start with three measures:
- Manual handoffs. How many times did someone have to move a file, copy, or decision between tools?
- First-pass completion. How many pieces made it to the correct destination without a fix or retry?
- Time from approval to scheduling. Once the post was ready, how long did it take for someone to confirm it was in the scheduler?
Run the workflow again and use the same measures. If the team copies fewer fields but keeps having to fix the destination account, you know where to work next. If scheduling is quick and approvals still take a day, look at how the reviewer gets the post and whether they have everything they need to decide.
The gains can carry into the next piece of work. Once you know which information a reviewer needs for a short video, you can reuse that checklist on the next series. Once you know what confirms a successful handoff, you can build that check into the next channel you add. Those are improvements you can see over a few runs. If you want to make a case for taking on more work, you’ll have a record of what got easier and how much team time it freed up.
Step 5. Run one complete workflow before expanding it
Keep the first version narrow. Choose one brand, one kind of content, and one destination. For a weekly short video, the path might be approved script, finished clip, selected title and caption, review, and confirmation in the scheduler. Put it on one page so a teammate can follow it.
Run it once with everything filled in. Open the destination yourself and check the account, time, copy, and video. If publishing is part of the workflow, return after the scheduled time and open the live post. Write down what you checked so the next person knows which parts were verified.
Then try the workflow with one missing input in a test where nothing will publish. Watch what happens when a video is missing or the account can’t be matched. Can you tell why it stopped? Does someone know how to fix it? Can they retry without creating a duplicate? Those questions tell you more about whether the workflow is ready for your team than a single run with perfect inputs.
For the next normal run, have someone else follow the instructions while you watch. Notice what they ask you. If they have to ask which caption to use, where to find the final video, or how to tell whether it’s scheduled, put the answer in the workflow. When you add another platform, check what that platform needs and run the same tests for that destination.
Pick one handoff to fix this week
Think about the last piece of content your team finished. Where did somebody have to send a message saying “Which version is final?” or open another tool to see whether the work made it there?
Start there. Write down what the next step needs, who makes the decision, and what you’ll check to confirm it happened. Use that note the next time you do the work. You’ll find out where the process still depends on somebody remembering a detail, and you’ll know what to fix before you automate more of it.
Back to zenna blog